Computer Station Nation is reader-supported.
When you buy through links on our site, we may earn an affiliate commission. Learn more.
Bad streaming lighting usually isn’t a hardware problem — it’s a setup problem. Before you buy anything, run through this list. Nine times out of ten the fix is free.
Problem: You look too dark or underexposed
Fix 1: Check your light source position
Your light needs to be in front of you, not behind or beside you. If your main light (window, lamp, ring light) is behind the camera — great. If it’s behind you, you’re a silhouette. Move the light to face you or turn your desk so you face the light.
Fix 2: Raise camera exposure or brightness
In OBS, right-click your video capture device → Properties → and adjust the brightness/exposure slider if your camera allows software control. If you’re using a DSLR or mirrorless, bump the ISO or open the aperture. Webcams (Logitech, Razer) usually have companion software with an exposure slider.
Fix 3: Move closer to your existing light
Light intensity follows the inverse square law — double your distance from a light source and you lose 75% of the light. If your ring light or lamp is 4 feet away, try 2 feet. It makes a dramatic difference without buying anything.
Problem: You look washed out or overexposed
Fix 1: Reduce light brightness or add distance
Most ring lights and LED panels have a dimmer. Drop it to 50–70% and back the light up a foot or two. The goal is even illumination, not maximum brightness.
Fix 2: Lower camera exposure
Use your camera or webcam software to reduce exposure. On webcams: open the companion app or OBS properties and drop the exposure value. On manual cameras: increase shutter speed or reduce ISO.
Fix 3: Add a diffuser
If your light is too harsh and direct, a diffuser softens it. Cheap options: a white sheet of paper taped in front of the light, a white shower curtain, or a dedicated diffusion panel. This spreads the light more evenly and reduces hard shadows.
Problem: Half your face is in shadow
Fix 1: Add a fill light on the shadow side
A single light source always creates shadows on the opposite side. Add a second light at lower brightness (about half the power of your main light) on the shadow side to fill them in. Even a cheap lamp works — you don’t need a matching unit.
Fix 2: Use a reflector
Bounce light back from the shadow side using a white foam board, a mirror, or even a white wall. Position it on the opposite side of your key light and angle it toward your face. Free fix, works surprisingly well.
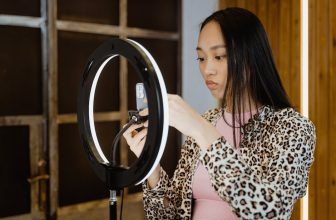
Fix 3: Move to a ring light
If you’re using a single panel or lamp and getting harsh shadows, a ring light solves this by design — the circular shape wraps light around your face evenly. It’s not the premium solution but it’s a good step up from a lamp.
Problem: Your skin looks orange or blue/green
Fix 1: Match your color temperatures
Every light source has a color temperature measured in Kelvin. Warm lights (incandescent bulbs, sunset) are around 2700–3200K. Cool lights (daylight, blue LEDs) are around 5500–6500K. If you’re mixing these — say, a warm desk lamp and a cool ring light — you’ll get color cast on your skin.
Fix: set all your lights to the same color temperature. If your ring light has a color temp dial, match it to your other sources. Daylight (5600K) is the standard for streaming — it makes white skin look neutral and darker skin tones look accurate.
Fix 2: Eliminate competing ambient light
Sunlight through windows changes color temperature throughout the day (warm at sunrise/sunset, cool at midday). If ambient light is mixing with your artificial lights, you’ll get inconsistent color. Either control your blinds so no natural light enters, or stream at a consistent time when ambient light is predictable.
Fix 3: Adjust white balance on camera
Set your camera white balance manually rather than using auto. Auto white balance shifts constantly as your scene changes, creating color flicker mid-stream. On webcams with companion software (Logitech G Hub, Razer Synapse), find the white balance setting and lock it. On DSLR/mirrorless cameras, set it manually to match your light temp (e.g., 5600K).
Problem: Your stream looks flat and boring even with good lighting
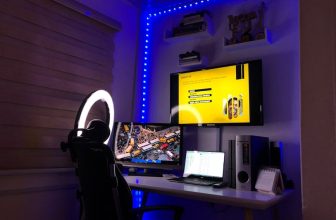
Fix 1: Add a background light
Flat lighting means everything is the same brightness — you, the background, everything. Add a light pointing at your background (at reduced power) to create depth separation between you and what’s behind you. Even a cheap LED strip behind your monitor creates a bias light that makes the scene look less like a webcam call.
Fix 2: Move your key light off-axis
Directly-frontal lighting (light source directly in line with your camera) creates a flat look with no dimension. Move your key light 30–45 degrees to one side. This creates a slight shadow on one side of your face that adds depth and makes you look more three-dimensional on camera.
Fix 3: Add color to your background lighting
RGB LED strips or bias lights behind your monitor or desk can add a colored accent to your background. Keep it subtle — a blue or purple glow behind your setup reads well on stream without distracting from your face. Match the color to your brand colors if you have them.
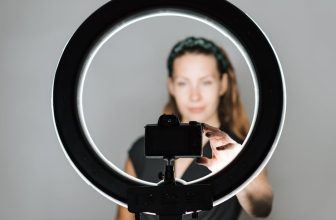
Problem: Ring light reflection in glasses
Fix 1: Angle the ring light above eye level
Position the ring light above your camera and tilt it downward at about 15–20 degrees. This shifts the reflection toward the top of your lenses, where it’s mostly out of frame or less distracting.
Fix 2: Move the ring light off-center
Instead of centering the ring light with the camera, offset it 12–18 inches to one side. The reflection shifts to the edge of the lens rather than the center. You lose the perfect symmetrical catchlight but gain a much cleaner look.
Fix 3: Switch to a panel light
The ring catchlight is impossible to fully eliminate from glasses. If reflections are a persistent issue, switch to an LED panel — the rectangular catchlight is much easier to angle out of the shot. Position the panel at 45 degrees to the side and angle it slightly downward.
Problem: Your face flickers or your exposure keeps changing
Fix 1: Turn off auto-exposure on your camera
Auto-exposure reacts to movement — when you move your hands or a light changes, the camera adjusts, causing visible brightness shifts mid-stream. Lock your exposure manually. In OBS: video capture device properties → uncheck “auto” for exposure. On DSLR: switch to manual (M) mode.
Fix 2: Check for flicker from mismatched power frequency
In the US, electrical power runs at 60Hz. Cameras set to certain shutter speeds (like 1/100s) can pick up a flickering effect from artificial lights. Set your shutter speed to 1/60s (US) or 1/50s (EU/UK/Australia) to sync with your power frequency and eliminate flicker.
Fix 3: Eliminate moving light sources
Windows let in light that changes throughout the day. Monitors change brightness as content changes on screen. Game lighting or RGB effects can cause visible color shifts on your face. Black out windows if possible, point monitors away from your face, and keep RGB lighting behind you rather than in front.
Still not right?
Most streaming lighting problems are solvable without buying anything new. Work through placement and settings before reaching for your wallet. If you’ve fixed all of the above and still aren’t happy with the look, that’s when it makes sense to upgrade your light — but by that point you’ll know exactly what you need and why.
FAQ
Why does my lighting look fine in person but bad on stream?
Cameras process light differently than the human eye. They have a narrower dynamic range — they blow out highlights and crush shadows more aggressively. What looks fine in person may be overexposed or underexposed through a lens. Always check your look through the camera, not your eyes.
What color temperature is best for streaming?
5600K (daylight) is the standard. It renders skin tones accurately across different complexions, looks clean and neutral, and matches the “professional” look most viewers expect from streaming content. Warmer temps (3200K) can look cozy but often read as “yellow” on camera.
Should I dim my room lights when streaming?
Generally yes — or at least control them. Overhead fluorescent or incandescent lighting competes with your streaming lights and creates color mixing. Either turn off room lights and rely fully on dedicated streaming lights, or make sure all light sources are the same color temperature.
Does background lighting actually matter?
More than most people think. A lit background separates you visually from the scene, makes the image look three-dimensional, and covers up a wall that might otherwise look dull or distracting. It’s often the step that makes a setup go from “good” to “looks like a real streaming setup.”