Computer Station Nation is reader-supported.
When you buy through links on our site, we may earn an affiliate commission. Learn more.
What is bias lighting?
Bias lighting is a strip of LEDs mounted behind your monitor that casts a soft glow onto the wall behind it. The idea is simple: your eyes are constantly adjusting to the contrast between your bright screen and the dark room around it. That constant adjustment causes fatigue. Bias lighting reduces the difference between the two, giving your eyes an easier time.
The term comes from “bias” in the electrical sense — a background voltage that shifts the operating point of a circuit. Same principle here: the ambient light shifts the perceptual baseline so bright content doesn’t punch as hard.
The actual benefits (and what’s overhyped)
Real benefits:
- Less eye strain — especially during long sessions in dark rooms
- Perceived contrast improvement — the glow tricks your eyes into seeing blacks as deeper
- Easier calibration — a D65 6500K white bias light is the reference standard for professional color work
Overhyped claims:
- It won’t dramatically improve picture quality on a mediocre panel
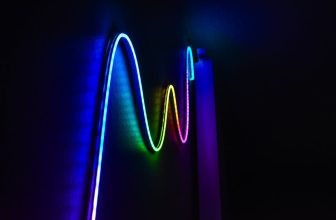
- Colorful RGB bias lighting looks cool but does almost nothing for eye strain vs. white
- It won’t fix a monitor that’s too bright — calibrate your brightness first
What you need
You have two routes:
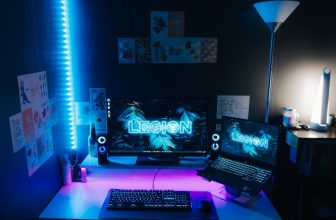
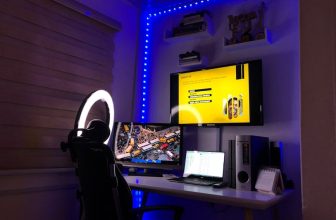
Option 1: LED strip lights (budget, DIY)
A basic USB-powered LED strip — white or RGB — stuck to the back of the monitor. Cost: $10–25. Works fine. Not smart, not synced, but gets the job done.
What to look for:
- Long enough to cover the back perimeter (measure your monitor diagonal — a 27″ monitor is roughly 24″ wide)
- USB-powered if you want clean cable management (pulls from the monitor’s USB hub or a port on the back of your PC)
- Color temperature around 6500K if you care about accuracy; warm white if you prefer a cozy vibe
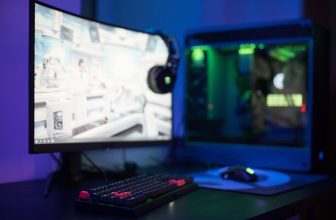
Option 2: Smart/synced bias lighting (Govee, Philips Hue, etc.)
These connect to your PC via USB + camera or software capture and sample your screen’s colors in real time, then mirror them on the LEDs behind the monitor. The effect is immersive — you’ll see the colors of what you’re playing bloom out behind the display.
Popular options: Govee Immersion, Philips Hue Play Gradient Lightstrip, Corsair iCUE Lighting Node.
Tradeoff: they’re more expensive ($50–150+), require software, and the screen-sampling approach adds slight latency. Not noticeable for most content; occasionally visible during fast cuts.
Step-by-step: basic LED strip setup
This covers the most common scenario — a standard USB LED strip on a flat-back monitor.
Step 1: Measure your monitor
Measure the width and height of the back of the monitor. Most bias lighting kits are sized for 24″–32″ monitors. If your monitor has a thick bezel or unusual back shape, note that too.
Step 2: Clean the back of the monitor
Wipe the back panel with isopropyl alcohol on a cloth. The LED strip’s adhesive backing needs a clean surface to stick properly. Skip this and the strip will peel off within a week.
Step 3: Plan your route
You want the LEDs to run around the inner perimeter of the back of the monitor — not the outer edge. Keep the strip 1–2 inches from the edge so the light diffuses onto the wall rather than spilling around the sides of the screen.
Starting point: most people start at the bottom center or bottom corner, run up one side, across the top, down the other side, and stop. This avoids the strip needing to bend sharply at corners more than necessary.
Step 4: Apply the strip
Peel a few inches of backing at a time. Press firmly and hold for a few seconds at each section before moving on. At corners, either use the pre-cut corner connectors (if included) or bend the strip gently — don’t crease it sharply or you’ll break the circuit.
Step 5: Route the cable
Run the USB cable down the monitor stand or along the cable management channel if your desk has one. Plug into a USB port on the monitor itself (if available), a USB hub, or a port on your PC. Avoid plugging into a charging brick — some strips are sensitive to voltage fluctuations from high-current chargers.
Step 6: Set the brightness
Bias lighting should be visible but not competing with the screen. A good rule: in a dark room, you should be able to see the glow on the wall without it being bright enough to distract your peripheral vision. Start at 30–40% brightness and adjust from there.
Step 7: Set the color temperature (white strips)
For general use, 5000K–6500K (cool white/daylight) reduces eye strain the most. 6500K is the D65 standard used in professional color work — if you do photo or video editing, match your monitor’s color temperature to 6500K and use a 6500K bias light.
For gaming/ambiance, warm white (2700K–3000K) creates a cozier feel. RGB depends entirely on your preference — just be aware it won’t help with eye strain.
Step-by-step: synced bias lighting (Govee Immersion example)
The process varies by brand, but Govee Immersion is the most popular affordable option:
- Install the Govee Home app on your PC
- Plug the USB LED strip into the included controller box
- Plug the controller’s USB into your PC
- Mount the LED strip on the back of the monitor (same process as above)
- Position the USB camera at the top center of your monitor — it captures screen colors in real time
- In the app, select “Screen Mirror” mode and calibrate the capture area to match your monitor’s screen bounds
The camera-based approach works with any content on any app — games, video, desktop. No GPU or special drivers needed.
Positioning tips
- Wall distance matters — bias lighting works best when your monitor is 2–6 inches from the wall. Too close and the glow is a thin line; too far and it dissipates before making an impact.
- Wall color matters — white or light grey walls reflect bias light most neutrally. Colored walls will tint the glow.
- Don’t aim LEDs at the screen — the strip should face the wall, not forward. If you can see the individual LEDs from your seated position, reposition the strip to face backward.
Common mistakes
- Too bright — the bias light shouldn’t be the brightest thing in your peripheral vision. Dim it down.
- Wrong color temp — warm orange LEDs behind a cool-white calibrated monitor create a jarring contrast. Match temperatures for a cohesive look.
- Monitor too far from wall — if you’re more than 8 inches from the wall, the effect is mostly lost. Either move the monitor closer or skip bias lighting.
- Sticking strip to a curved monitor — curved monitors have a complex back surface. Use small pieces with gaps at curves rather than forcing the strip around tight bends.
Frequently asked questions
Does bias lighting actually reduce eye strain?
Yes, when used correctly. The key is matching the color temperature to your monitor and keeping the brightness moderate. Studies on contrast adaptation show that ambient lighting behind a screen reduces the pupil’s constant adjustment cycle.
What color temperature is best for bias lighting?
6500K (D65 daylight) for accuracy and eye strain reduction. Warmer whites if you prefer aesthetics over function. Avoid very warm amber tones (under 2700K) if you’re mixing with a cool-white monitor.
Can I use bias lighting with an ultrawide monitor?
Yes — you’ll just need a longer strip. Measure your ultrawide’s back perimeter and buy accordingly. Most standard kits (designed for 24″–32″) won’t fully cover an ultrawide.
Do I need smart/synced bias lighting or will a basic strip work?
A basic white strip is better for eye strain and productivity. Synced RGB bias lighting is better for gaming immersion. If your goal is reducing fatigue during long work sessions, save the money and get a simple white LED strip.