Computer Station Nation is reader-supported.
When you buy through links on our site, we may earn an affiliate commission. Learn more.
Setting up a webcam for streaming takes about ten minutes. Setting it up well takes a bit more thought. Here’s how to go from plugged in to actually looking good on camera.
Step 1: Physical positioning
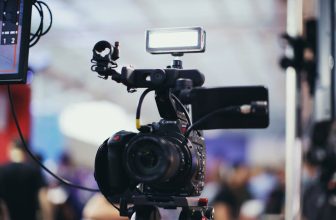
Camera at eye level or slightly above. Never below — the up-the-nose angle is unflattering and makes you look like you’re reading something on your desk. Mount it on top of your monitor. If it’s a standalone webcam with a tripod, get it to monitor-top height before worrying about anything else.
Distance: 18–30 inches from your face for most webcams. Too close and wide-angle distortion kicks in. Too far and you’re a small figure in a large frame. For 78° FOV webcams (Logitech C920 range), about 24 inches gives a natural face-and-shoulders framing.
Step 2: Light source
Sort your lighting before touching any camera settings. A ring light or key light in front of you, slightly above eye level. Camera settings can’t compensate for bad lighting — all they can do is expose for whatever light is there. If the light is bad, the image is bad.
Turn off lights behind you. Windows behind you create backlighting that forces the camera to expose for the bright background, leaving your face dark. Close the blinds or move so the window is in front of you or to the side.
Step 3: OBS source setup
In OBS: Sources → + → Video Capture Device. Select your webcam from the device dropdown. Set resolution to 1920×1080 if your webcam supports it. Frame rate: 30fps is fine for most streaming setups; 60fps is noticeably smoother for streams with a lot of movement.
In the video capture device properties, turn off “Use Preset” and manually set resolution and frame rate — OBS’s automatic detection sometimes picks lower defaults. Check that the output format matches your scene canvas resolution (Settings → Video → Base Resolution).
Step 4: Camera settings in OBS
Right-click your webcam source → Properties → Configure Video. In the camera control panel, disable auto-exposure if the image is flickering when you move. Set white balance to a fixed value (5500K for daylight-balanced lighting) rather than auto — auto white balance shifts noticeably on stream when you move in the frame.
Sharpness: most webcams are over-sharpened by default. Reducing it slightly gives a more natural skin texture rather than the over-processed look common in budget webcam output.
Step 5: Test before going live
Start a local recording in OBS (not a stream) and watch playback. Check: is your face well-lit and in focus? Is the frame steady? Is auto-exposure flickering? Fix issues in the recording before you find them live.