Computer Station Nation is reader-supported.
When you buy through links on our site, we may earn an affiliate commission. Learn more.
Bad desk lighting is almost always a placement problem, not a product problem. People buy decent lamps and strips and still end up with glare, eye strain, and a setup that looks flat — because they put things in the wrong spots.
This guide walks through setup in the order it actually matters, starting with your monitor and building out from there.
What you’ll need
- A desk lamp with adjustable color temperature
- An LED strip for behind the monitor (bias lighting)
- Optional: RGB strips for underglow, smart bulbs for room ambient
- A power strip or USB hub if you’re short on outlets
Setup time: 20–30 minutes. Most of that is cable management.
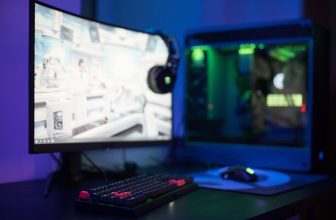
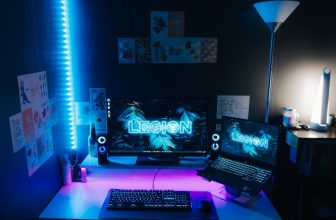
Step 1: Start with bias lighting behind your monitor
Before anything else, put a light source behind your monitor. This is the single highest-impact change you can make to desk lighting, and it takes five minutes.
An LED strip with adhesive backing sticks directly to the back edge of your monitor — run it along the top and sides. Plug it into a spare USB port on your PC, monitor, or hub.
Color temperature: 6500K (cool white) is the standard for neutral bias lighting. If you prefer warmer ambient, 4000–4500K works. Avoid very warm white (2700K) as bias light — it reads muddy against a bright screen.
If you’re using RGB: set it to a dim white or a single low-saturation color. Bright saturated RGB behind your monitor looks great in photos but gets distracting fast during actual work or gaming.
Step 2: Position your desk lamp correctly
Most people put their desk lamp in the wrong spot. Two common mistakes:
- Behind the monitor — creates backlight glare on screen. Don’t do this with the main lamp.
- Directly in front — shines into your eyes. Also bad.
The right position: to the side of your monitor, slightly behind the plane of the screen, angled down at your desk surface. If you’re right-handed, left side is better — it won’t cast a shadow across your writing hand.
Height matters: the lamp head should be above eye level when you’re seated. Light coming from above at an angle is how natural daylight works. Light coming from below looks weird and strains your eyes.
Step 3: Set color temperature to match your task
If your lamp has adjustable color temperature, here’s the general guide:
- 5000–6500K (cool white / daylight) — for focused work and programming; keeps you alert
- 3500–4500K (neutral white) — all-day general use; the least fatiguing over long sessions
- 2700–3000K (warm white) — evening use; easier on the eyes when the room light dims down
Don’t obsess over exact numbers. The practical move: run cool-white during the day, warm-white in the evening. If your lamp has a timer or smart scheduling, set that up once and forget it.
Step 4: Deal with monitor glare
If you can see a light source reflected in your monitor, that’s glare — and it’s causing fatigue whether you notice it or not. Fix it before touching anything else.
The usual culprits: a window directly behind or to the side of the screen, a desk lamp positioned too high and forward, or an overhead light hitting the screen at the wrong angle.
Fixes: tilt the monitor slightly downward (3–5 degrees), reposition the lamp, add a monitor hood if window glare is unavoidable, or close the blinds. Anti-glare screen protectors exist but they degrade image quality — fix the light source first.
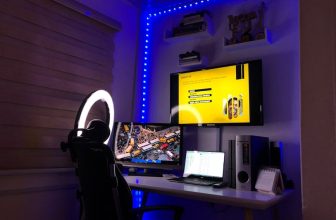
Step 5: Add ambient room lighting (optional but worth it)
Once the desk itself is sorted, the room lighting behind you matters. A dark room with a bright monitor = more eye strain. Some ambient light in your peripheral vision reduces the contrast load on your eyes.
Options from simple to involved:
- Smart bulb in a floor lamp behind your chair — automated warm-to-cool schedule
- LED strips along a bookshelf or behind furniture — soft indirect glow
- Bias light on the wall behind your desk (not just the monitor) — expands the lit area
The goal: enough ambient light that the monitor doesn’t feel like the only thing in a dark room, without adding direct light that competes with your screen.
Step 6: Run your cables
This is where most setups fall apart aesthetically. A well-lit desk looks bad if cables are dangling everywhere. Quick fixes:
- Cable clips or adhesive raceways along the back of the desk
- Velcro ties for bundles (reusable, easy to adjust)
- Route USB lamp cables up the monitor stand or along the desk edge
- A small cable management tray under the desk hides the power strip and excess cable slack
You don’t need to be perfect — you just need the cables out of eyeline from your seated position.
Common setup mistakes
- Too bright bias lighting — the strip behind the monitor should be subtle. If it’s the brightest thing in your peripheral vision, dim it down.
- Wrong color temp at night — running cool white at 11pm messes with sleep. Set up warm white for evening use.
- Lamp too close to the screen — creates hotspots on the display. The lamp should light your desk surface, not your monitor.
- Ignoring the room — sorting the desk but leaving the rest of the room pitch black defeats the purpose of bias lighting.
FAQ
Do I need smart lighting or will a regular lamp work?
A regular dimmable lamp with adjustable color temp works well. Smart lighting earns its cost through automated scheduling — if you don’t want to manually adjust your lamp twice a day, a smart lamp pays off. If you don’t mind adjusting it yourself, a non-smart lamp is fine.
What wattage should a desk lamp be?
For LED lamps, 5–10W is typical for a desk lamp and provides adequate light output (400–800 lumens). More wattage than that is usually overkill for a single desk. Check lumens rather than watts — a well-designed 5W LED lamp can outperform a poorly designed 12W one.
Should bias lighting be white or RGB?
White (around 6500K) is better for eye strain reduction and is the professional standard for color-accurate work. RGB bias lighting looks cool, especially with screen-sync, but its eye strain benefits are minimal compared to white. Pick based on whether function or aesthetics is the priority.
How bright should my monitor be with bias lighting?
Lower than you probably have it right now. With bias lighting reducing the contrast between screen and room, you can drop monitor brightness 20–30% and the display still looks vivid. Lower brightness = less eye strain and longer monitor lifespan.