Computer Station Nation is reader-supported.
When you buy through links on our site, we may earn an affiliate commission. Learn more.
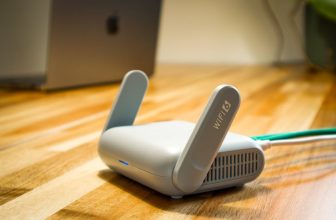
Setting up a new router feels intimidating the first time. It isn’t. You can have your new router up and running in under 15 minutes. Here’s the full step-by-step process.
What You’ll Need
- Your new router (and its power adapter)
- The Ethernet cable that connects your modem to your router (usually included)
- Your ISP login credentials (usually on a sticker on your modem or in your ISP welcome email)
- A phone or laptop for setup
Step 1: Unplug Your Existing Equipment
Power off your modem and any existing router. Unplug the Ethernet cable between them. Give it 30 seconds before you do anything else — modems can hold DHCP leases and reconnecting too fast can cause issues.
Step 2: Connect Modem to Router
Run an Ethernet cable from your modem’s output port (usually labeled “LAN” or “Internet” on the modem) to your router’s WAN port (usually labeled “WAN” or “Internet” on the router, often a different color than the LAN ports). This is the only cable connection that must be correct before you power on.
Step 3: Power On
Plug in and power on the modem first. Wait 60 seconds for it to fully connect to your ISP. Then plug in and power on the router. The router’s status lights will cycle through startup — typically 1-2 minutes before the Wi-Fi network broadcasts.
Step 4: Run Setup
Most modern routers (TP-Link, NETGEAR, ASUS) use a mobile app for setup. Download the app, create an account if required, and follow the guided setup. The app will detect your router, walk you through naming your network and setting a password.
If your router uses a web interface instead: connect to the temporary “setup” Wi-Fi network printed on the router label, open a browser, and go to 192.168.0.1 or tplinkwifi.net (varies by brand). Follow the setup wizard.
Step 5: Set Your Network Name and Password
Pick a network name (SSID) that doesn’t identify your location or router model — don’t broadcast to your neighbors exactly what you’re running. Set a strong password: 12+ characters mixing letters, numbers, and symbols. Use WPA3 if your router supports it; WPA2 if not.
Step 6: Connect Your Devices
Connect your gaming rig via Ethernet if possible — find the router’s LAN ports (usually numbered 1-4) and run a cable. Connect phones, tablets, and laptops via Wi-Fi using the network name and password you just set.
Step 7: Confirm Internet Access
Run a quick speed test at fast.com or speedtest.net from a wired device. Confirm speeds match your ISP plan. If they don’t, power cycle the modem (unplug 30 seconds, replug) and test again.
Common Setup Problems
- No internet after setup — Most likely the modem hasn’t released the old DHCP lease. Power cycle the modem with the router already connected. Wait 90 seconds.
- Can’t reach the admin panel — You’re probably connected to the wrong network. Connect to the router’s setup SSID (on the label) not your home network.
- ISP requires login credentials — Some ISPs (especially fiber) require PPPoE credentials during setup. Enter these in the WAN settings during initial configuration.
- Slow speeds on Wi-Fi — Check which band you’re on. For best performance near the router, connect to 5 GHz. For range, use 2.4 GHz.