Computer Station Nation is reader-supported.
When you buy through links on our site, we may earn an affiliate commission. Learn more.
Background noise is the silent killer of otherwise great audio.
You’ve got a decent mic. You positioned it right. And then your recording gets ruined by HVAC hum, keyboard clatter, a car outside, or the refrigerator compressor cycling on three rooms away. It happens to everyone.
Here’s how to actually fix it — hardware solutions first, software fixes second.
Understand What You’re Fighting
Background noise comes from two places: your room and your mic chain. Treating them requires different approaches.
- Room noise — HVAC, traffic, ambient hum, reverb from hard surfaces, sound leaking in from other rooms.
- Mic chain noise — electrical interference, preamp hiss, USB power noise, poorly shielded cables.
Address room noise acoustically and physically first. Software noise removal is a last resort — it always degrades your audio quality at least a little.
Hardware & Physical Solutions (Do These First)
1. Switch to a Dynamic Microphone
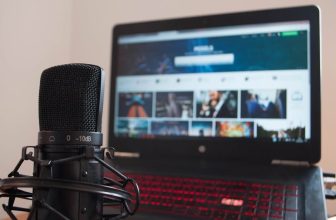
This is the most underrated solution. Dynamic mics (like the Shure SM7B, Shure MV7, or Audio-Technica AT2005USB) are significantly less sensitive than condenser mics. They don’t capture room noise nearly as aggressively. If you’re fighting persistent background noise and you’re currently using a condenser, switching to a dynamic mic might solve your problem without any software intervention at all.
The tradeoff is that you need to speak closer to the mic (6–8 inches instead of 12). Totally manageable with a boom arm.
2. Get Closer to the Mic
This one is free and immediate. The closer you are to the mic, the stronger your voice signal relative to room noise — physics. Double your proximity and you quadruple the ratio of voice to background. Move from 12 inches to 6 inches and the noise floor effectively drops significantly.
This is why you see streamers with their mic in their face. It’s not aesthetic — it’s practical.
3. Use a Cardioid Pickup Pattern
If your mic supports multiple polar patterns, use cardioid. It rejects sound from the sides and rear. Make sure the front of the mic (the capsule side) is facing your mouth — not the top or the back. Some mics are side-address (speak into the side), some are end-address (speak into the top). Check the manual if you’re unsure.
4. Add a Reflection Filter or Recording Shield
A reflection filter is a curved acoustic foam panel that mounts behind your mic on the stand. It blocks sound coming from the rear of the room from reaching the rear of the mic capsule. They cost $20–$60 and make a real difference in reverberant rooms. Brands like sE Electronics, Kaotica Eyeball, and TONOR all make solid options.
For a free version: record in a closet with clothes around you. Sounds silly. Works extremely well. The clothes absorb reflections and the small space limits room ambience.
5. Address the Noise Source Directly
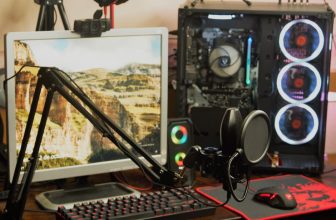
Sometimes the fix is obvious once you think about it. Turn off the ceiling fan. Pause the A/C during a recording. Close the window. Move the mic away from the computer tower (fan noise). Put a mouse pad under your keyboard to dampen typing sounds. These small changes compound.
6. Use a Shock Mount
A shock mount suspends your mic on elastic bands so that vibrations from your desk — keyboard typing, mouse clicks, bumping the desk — don’t travel through the stand into the mic capsule. Most mics come with a basic one, or you can buy one separately for $15–$40. Essential if you type while recording.
Software Solutions
Once you’ve done everything you can physically, these tools clean up what’s left. Use them after physical treatment, not instead of it.
Noise Gate
A noise gate cuts the audio signal when volume drops below a threshold. Between sentences, when you’re not speaking, the gate closes and blocks the background noise from being recorded. When you start speaking, it opens.
Where to find it: OBS Studio (Filters → Add Filter → Noise Gate), Krisp, NVIDIA RTX Voice, Voicemod.
Settings starting point: Close threshold around -50dB to -40dB. Open threshold 5–10dB higher. Attack: 5ms. Release: 150ms. Adjust based on your noise floor — the gate should close silently in pauses and open transparently when you speak.
NVIDIA RTX Voice / Broadcast
If you have an NVIDIA RTX GPU (1060 or newer), RTX Voice uses AI to remove background noise in real time. It’s genuinely impressive — it can remove mechanical keyboard clatter, HVAC noise, and even people talking in the background without significantly degrading voice quality. Install it from NVIDIA’s site, enable it as your virtual mic, and select the virtual mic in your apps.
Krisp
Krisp is a standalone noise cancellation app that works regardless of your GPU. Free tier gives you 60 minutes of noise cancellation per week. The paid plan ($8/month) removes the limit. Works as a virtual microphone that any app can select. Good results, though not quite as transparent as RTX Voice on a good GPU.
NVIDIA Broadcast Alternative: AMD Noise Suppression
AMD RX 6000 series and newer GPUs have their own noise suppression through AMD Software. Similar concept to RTX Voice. Access it through AMD Software → Streaming → Noise Suppression.
EQ: High-Pass Filter
A high-pass filter cuts everything below a set frequency. Most room noise, HVAC hum, and rumble lives below 80–100Hz. Human voice doesn’t. Adding a high-pass filter at 80Hz removes a significant amount of low-frequency noise without touching your voice. Available in OBS (Filters), Audacity (Effects → High Pass Filter), and any proper DAW.
Checking Your Results
The easiest way to measure progress is visually. Open Audacity, record 10 seconds of silence (just ambient room sound, not speaking), and zoom into the waveform. The amplitude of that silence is your noise floor. A well-treated recording space with a good dynamic mic might show a noise floor below -60dB. An untreated room with a sensitive condenser might be at -40dB or higher.
After each change you make — switching mic type, adding a reflection filter, enabling RTX Voice — record another silence test and compare. You’ll quickly see which interventions are actually moving the needle.
The Priority Order
If you’re not sure where to start, work through this list in order:
- Get closer to the mic
- Eliminate or reduce noise sources in the room (fans, A/C, windows)
- Use cardioid pattern, aimed correctly
- Add a shock mount if you type while recording
- Add a reflection filter if your room is reverberant
- Use RTX Voice or Krisp for residual noise
- Add a noise gate in OBS or your recording software
- Apply a high-pass filter at 80–100Hz
Most people solve their problem somewhere between steps 1 and 4. The software tools are there when the physical approach isn’t enough.