Computer Station Nation is reader-supported.
When you buy through links on our site, we may earn an affiliate commission. Learn more.
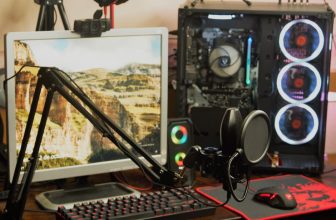
Setting up a microphone for your computer should take about five minutes. Somehow people make it way more complicated than it needs to be.
Here’s the complete guide — from unboxing to sounding good on your first recording.
What You’ll Need
- Your microphone (USB or XLR)
- USB cable (usually included) or XLR cable + audio interface
- A boom arm or mic stand (highly recommended — don’t skip this)
- Optional: pop filter, shock mount
Setting Up a USB Microphone
Step 1: Assemble the Mount
Before plugging anything in, get the mic physically set up. If you’re using a desk stand (the one that usually comes in the box), screw the mic into the stand. If you have a boom arm — and you should — clamp it to the edge of your desk and thread the mic into the arm’s mounting thread.
Most mics use a 5/8″-27 thread. If your boom arm has a 3/8″ thread, there’s usually an adapter included. If not, they cost about two bucks online.
If your mic came with a shock mount, use it. It isolates the mic from desk vibrations — keyboard clicks, mouse movements, that bass-heavy game you’re playing. Worth it.
Step 2: Position the Microphone
This step matters more than most people realize. Mic placement is the single biggest factor in how you sound — more than the mic itself.
- Distance: 6–12 inches from your mouth is the sweet spot. Too close and you’ll pick up every breath and mouth sound. Too far and you’ll sound distant and roomy.
- Angle: Point the mic slightly off-axis (offset 15–30 degrees from your mouth). This reduces plosives — those harsh popping sounds on “p” and “b” words — without losing clarity.
- Height: Level with your mouth or slightly below angled up is ideal. Avoid placing it directly above pointing down — that’s a webcam, not a mic position.
If you have a pop filter, position it between your mouth and the mic capsule, about 2–3 inches in front of the mic.
Step 3: Connect to Your Computer
Plug the USB cable into your mic and into an open USB port on your computer. That’s it. Windows and macOS both recognize USB audio devices automatically — no drivers needed for most mics.
Wait a few seconds. You should see the mic’s LED indicator light up (if it has one).
Step 4: Set Your Mic as the Default Input
On Windows:
- Right-click the speaker icon in the taskbar → Open Sound settings
- Under Input, click the dropdown and select your microphone
- Or go to Settings → System → Sound → Input and select your device
On macOS:
- System Settings → Sound → Input tab
- Select your microphone from the list
You’ll see the input level meter respond when you speak. If it moves, the system is receiving audio from your mic.
Step 5: Adjust Gain
Gain controls how sensitive your mic is — how loud of a signal it sends to your computer.
If your mic has a physical gain knob (most do), start at about 50–60% and speak at your normal recording volume. Watch the input level meter in Windows Sound settings or macOS Sound preferences. You want the meter hitting around -12dB to -6dB when you speak — active but not peaking into the red.
If you’re peaking (meter hitting the top, audio distorting), turn the gain down. If you’re barely registering, turn it up.
Setting Up an XLR Microphone
Step 1: Connect Mic to Audio Interface
Run an XLR cable from your microphone into one of the XLR inputs on your audio interface. Make sure the interface is powered off or at minimum gain while connecting — this prevents loud pops that could damage your speakers or headphones.
If your microphone is a condenser, it needs phantom power (+48V). Look for the 48V button on your interface and enable it. Dynamic mics don’t need phantom power and won’t be harmed by it being on (usually), but it’s good practice to only enable it when needed.
Step 2: Connect Interface to Computer
Most modern audio interfaces connect via USB-C or USB-A. Plug it in. The interface will show up as an audio device in Windows or macOS — set it as your input device following the same steps as above.
Step 3: Set Input Gain on the Interface
This is the gain knob on the interface itself (usually labeled with the channel number). Speak into the mic while slowly turning up the gain. Watch the interface’s clipping indicator — usually a small LED that turns red when you’re overloading the input. You want gain high enough to get a strong signal, but the clip light should never illuminate during normal speech.
Testing Your Setup
Quick Windows Test
Open the Voice Recorder app (search for it in the Start menu). Hit record, speak for 10 seconds, play it back. You’ll immediately hear if something’s wrong — distortion, hiss, too quiet, too much room echo.
Quick macOS Test
Open QuickTime Player → File → New Audio Recording. Hit the record button. Speak, stop, play back.
Free Software for Better Testing: Audacity
Download Audacity (free, open source). Set your input device to your mic, hit record, and look at the waveform while you speak. You want a healthy waveform that uses most of the dynamic range without clipping at the top or bottom. Way more useful than the system meters.
Setting Up Your Mic in Specific Apps
Discord
Settings → Voice & Video → Input Device → select your mic. Set Input Sensitivity to Manual and adjust the slider so it triggers when you speak but not from background noise. Turn off Noise Suppression and Echo Cancellation. These are destructive filters that will hurt the sound of a good mic. Let your mic’s polar pattern do the work instead.
OBS Studio
In the Audio Mixer section at the bottom, you should see your mic listed. If not, go to Settings → Audio → Mic/Auxiliary Audio and select your device. Add filters: a Noise Gate (to cut silence between sentences), and a Compressor (to even out your levels). These are the two most useful tools for making recorded audio sound polished.
Zoom
Settings → Audio → Microphone → select your device. Uncheck “Automatically adjust microphone volume” — you’ve already set your gain, let it stay there. Also uncheck “Suppress background noise” if you have a good mic in a quiet environment; Zoom’s noise suppression can make voices sound tinny and robotic.
Common Setup Problems and Fixes
Mic not showing up in Windows/macOS: Try a different USB port. Try a different cable. Restart your computer with the mic plugged in. Check Device Manager (Windows) for error flags on audio devices.
Sound is too quiet even with gain maxed: You might be speaking too far from the mic. Move closer. Also check that the correct device is selected as input — your computer’s built-in mic might be selected instead of your external mic.
Hearing yourself on a delay (monitoring latency): Disable software monitoring in your recording app and use the hardware monitoring if your mic has a headphone jack built in. Or lower the buffer size in your audio settings.
Crackling or static: USB power issue — try a different port, ideally directly on the motherboard rather than a USB hub. Also check that the cable is fully seated.
You’re Good to Go
That’s it. Get the mic positioned right, set your gain properly, and test before any live recording or call. The whole process takes ten minutes.
The biggest mistake people make is skipping the test step and then sounding terrible on their first Zoom call or stream. Don’t be that person. Record thirty seconds of test audio. Listen back. Adjust. Then go live.