Computer Station Nation is reader-supported.
When you buy through links on our site, we may earn an affiliate commission. Learn more.
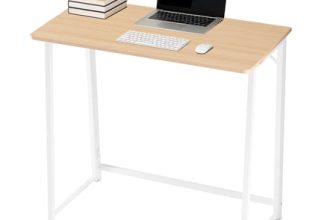
A wood desk — or a wood-finish desk — is a better-looking piece of furniture than most budget options. It’s also more maintenance-sensitive. Here’s what actually matters for keeping it in good shape.
Know what you’re actually working with
Most “wood” desks in the $50–200 range use MDF (medium-density fiberboard) with a wood-look veneer or laminate, not solid wood. The maintenance approach differs:
- Solid wood — can be sanded, refinished, and treated with wood oils. Responds to humidity changes. More expensive to buy, more repairable when damaged.
- MDF with veneer/laminate — the surface finish is the whole game. Once the finish chips or swells from moisture, it’s hard to repair cleanly. Prevention is the maintenance strategy.
If you don’t know which you have, check the edges and underside. Solid wood shows grain through; MDF shows a composite particle structure.
Daily habits that prevent 90% of damage
Clean up liquid immediately. MDF is particularly vulnerable to moisture — a coffee spill that sits for 10 minutes can cause the surface to swell and bubble in ways that can’t be fixed. Wipe up anything wet right away, every time.
Use a desk pad or mat under your mouse and keyboard area. This protects the finish from the friction and micro-scratches that add up over time. It also gives your mouse a better tracking surface, so it’s a win either way.
Don’t drag things across the surface. Lift monitors, peripherals, and accessories when moving them. Dragging scratches finishes and veneers consistently over time.
Cleaning the surface
For most wood-finish desks: a slightly damp microfiber cloth is enough for regular cleaning. Don’t use furniture polish unless you know it’s compatible with the specific finish — some polishes build up residue or interact badly with laminate finishes.
For solid wood: periodic treatment with wood-specific conditioner or oil (depending on the finish) keeps the grain from drying out. How often depends on humidity levels in your space — drier environments need more frequent treatment.
Protecting against scratches
Felt pads on the bottom of anything that sits on the desk surface (monitor stands, desk accessories, speaker bases). Applies to both solid wood and MDF — felt prevents the small scratches that accumulate into a visibly worn surface over time.
A keyboard wrist rest that stays in place is better than one that slides around — the edge of a sliding wrist rest creates consistent abrasion in one spot.
Repairing minor damage
For solid wood, shallow scratches can often be buffed out or covered with a matching furniture marker. Deeper gouges can be filled with wood filler and refinished. For MDF/laminate, the options are more limited — a furniture repair marker can hide light surface scratches, but delaminating or swelling from moisture is usually permanent.
FAQ
Can I use cleaning sprays on a wood desk?
On solid wood with an oil finish, avoid sprays entirely — use wood-specific products. On sealed wood or laminate finishes, a light spray of general-purpose cleaner on a cloth (not sprayed directly on the surface) is generally safe. Always test in an inconspicuous area first.
How do I prevent the desk surface from fading in sunlight?
Position the desk away from direct sunlight if possible. For desks that get consistent sun exposure, UV-filtering window film on nearby windows reduces fading significantly. Repositioning a desk pad periodically prevents uneven fading patterns from developing.
What’s the best way to fix a white ring from a drink?
White rings on wood surfaces are usually moisture trapped in the finish. On solid wood with a wax finish, try rubbing with a cloth slightly dampened with mineral spirits. On lacquered or laminate finishes, a white ring usually means the moisture reached the substrate — harder to reverse without refinishing.